Installation Manual - Roomonitor
Media immagine

Installation Manual

Thank you for choosing Roomonitor! We are thrilled that you have chosen our device to improve your living experience in your space. This manual will give you a step-by-step guide from the moment you receive your package to the full functionality of Roomonitor. Make sure to follow each instruction carefully to ensure a successful installation.

  1. Download our app
  2. Set up your device
  3. Monitor your properties
  4. Frequently asked questions (F.A.Q.)
Media immagine

Step 1

Download the app and log in

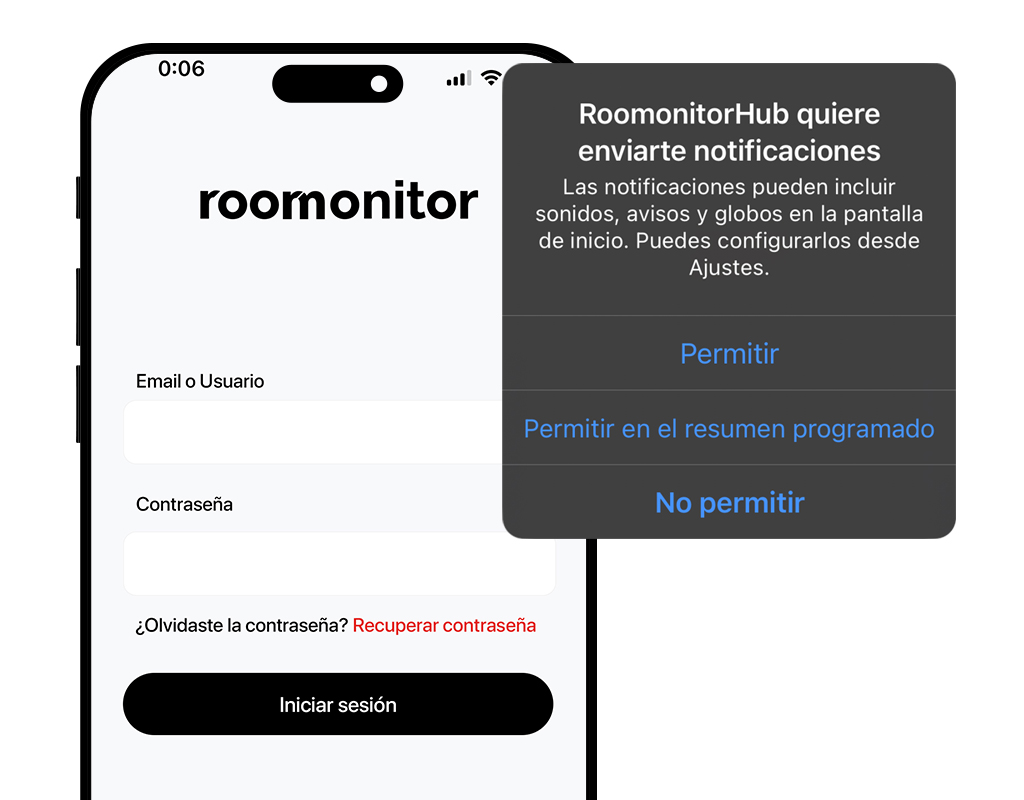
Launch the app and enter the login details previously provided by email. Don’t forget to enable the App notifications.

App Store

Media immagine

Step 2

Preparation and placement

Once you have opened the package, identify the items listed above. Before proceeding, consider the following tips for choosing the ideal location:
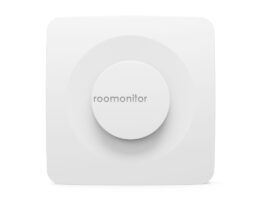
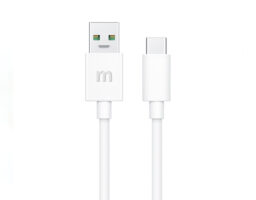
  • Choose an area where guests tend to gather, such as the lounge.
  • Avoid proximity to sources of noise, such as televisions or electrical appliances.
  • To ensure maximum effectiveness of its sensors, do not cover it.
  • Make sure there is WiFi network coverage.
  • Locate a nearby socket for power supply, remembering that the battery provides backup in case of tampering.

Box content:

dispositivo Roomonitorcable USBCargador

Media immagine
Step 3

Fixing the device

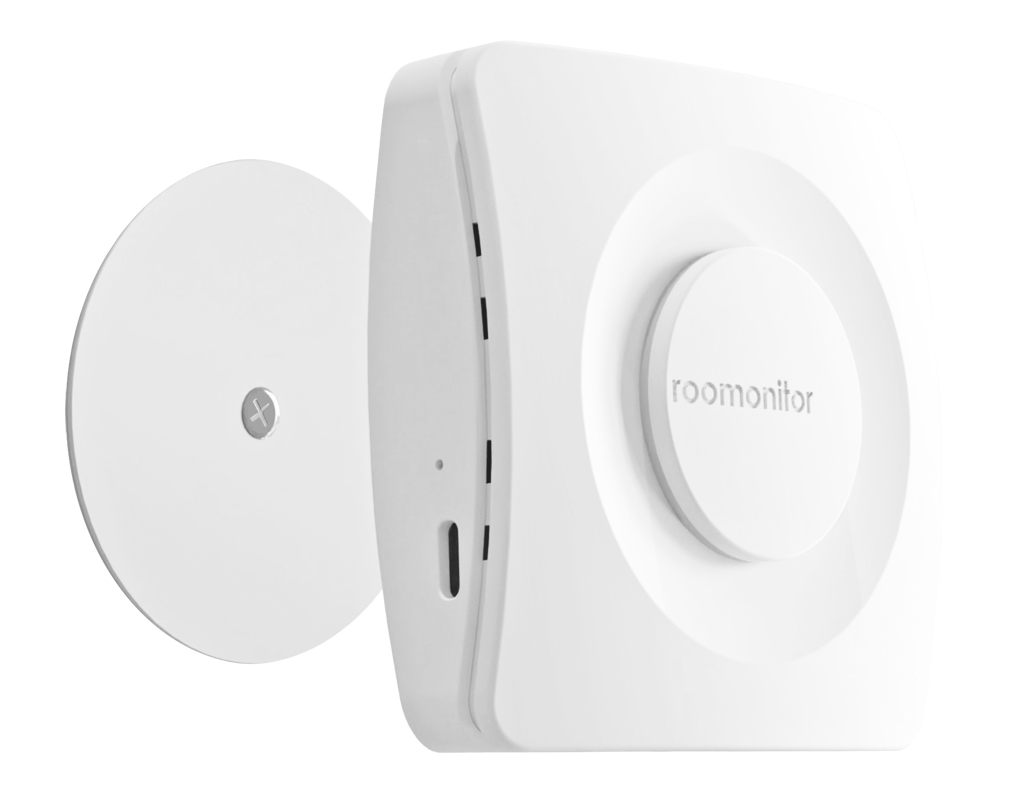
Decide whether to use the sticker or to screw the metal plate in the selected location. The second option is preferable on rough surfaces for better attachment.

Media immagine

Step 4

Connecting the device

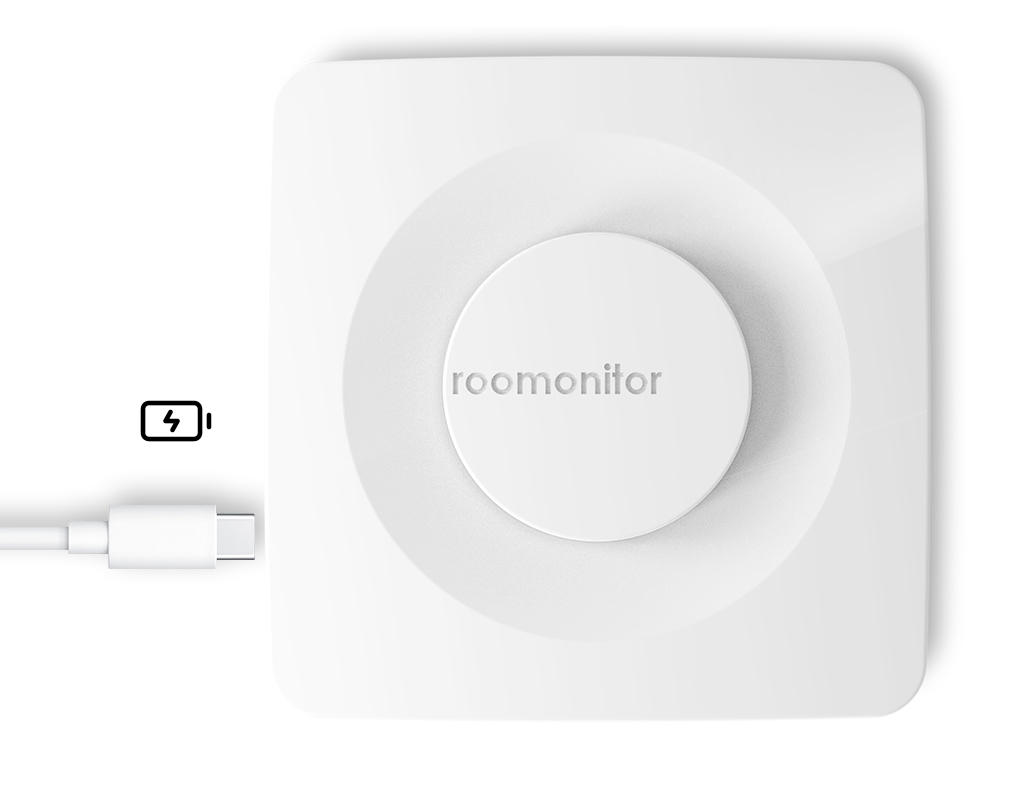
With the plate in place, connect the charger and plug the USB-C cable into the device.

Media immagine

Step 5

Start setup

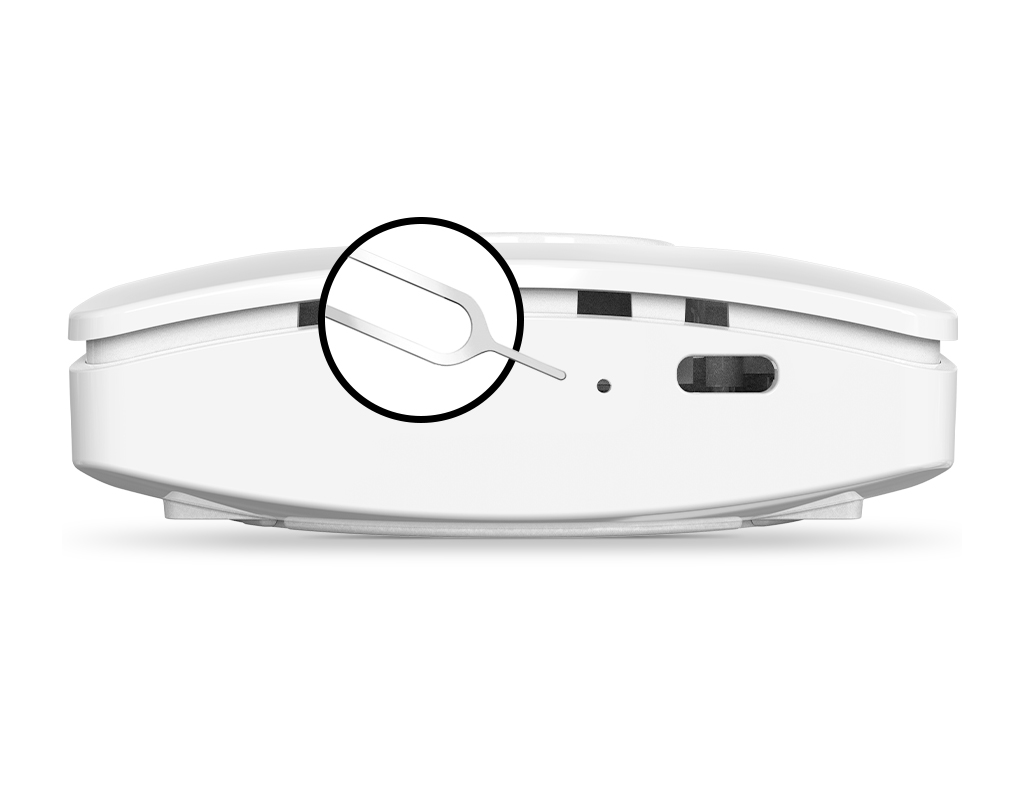
After installation and plugging in, you will see a small hole right next to the USB connector, with an object that fits inside (a paper clip for example) you have to make 1 quick press of the inner button, this will turn on the device. After that, you will have to press the inner button 3 times. On the third press, press and hold the button until the lights turn on. Stop pressing once the lights turn off.

Media immagine

Step 6

Device settings

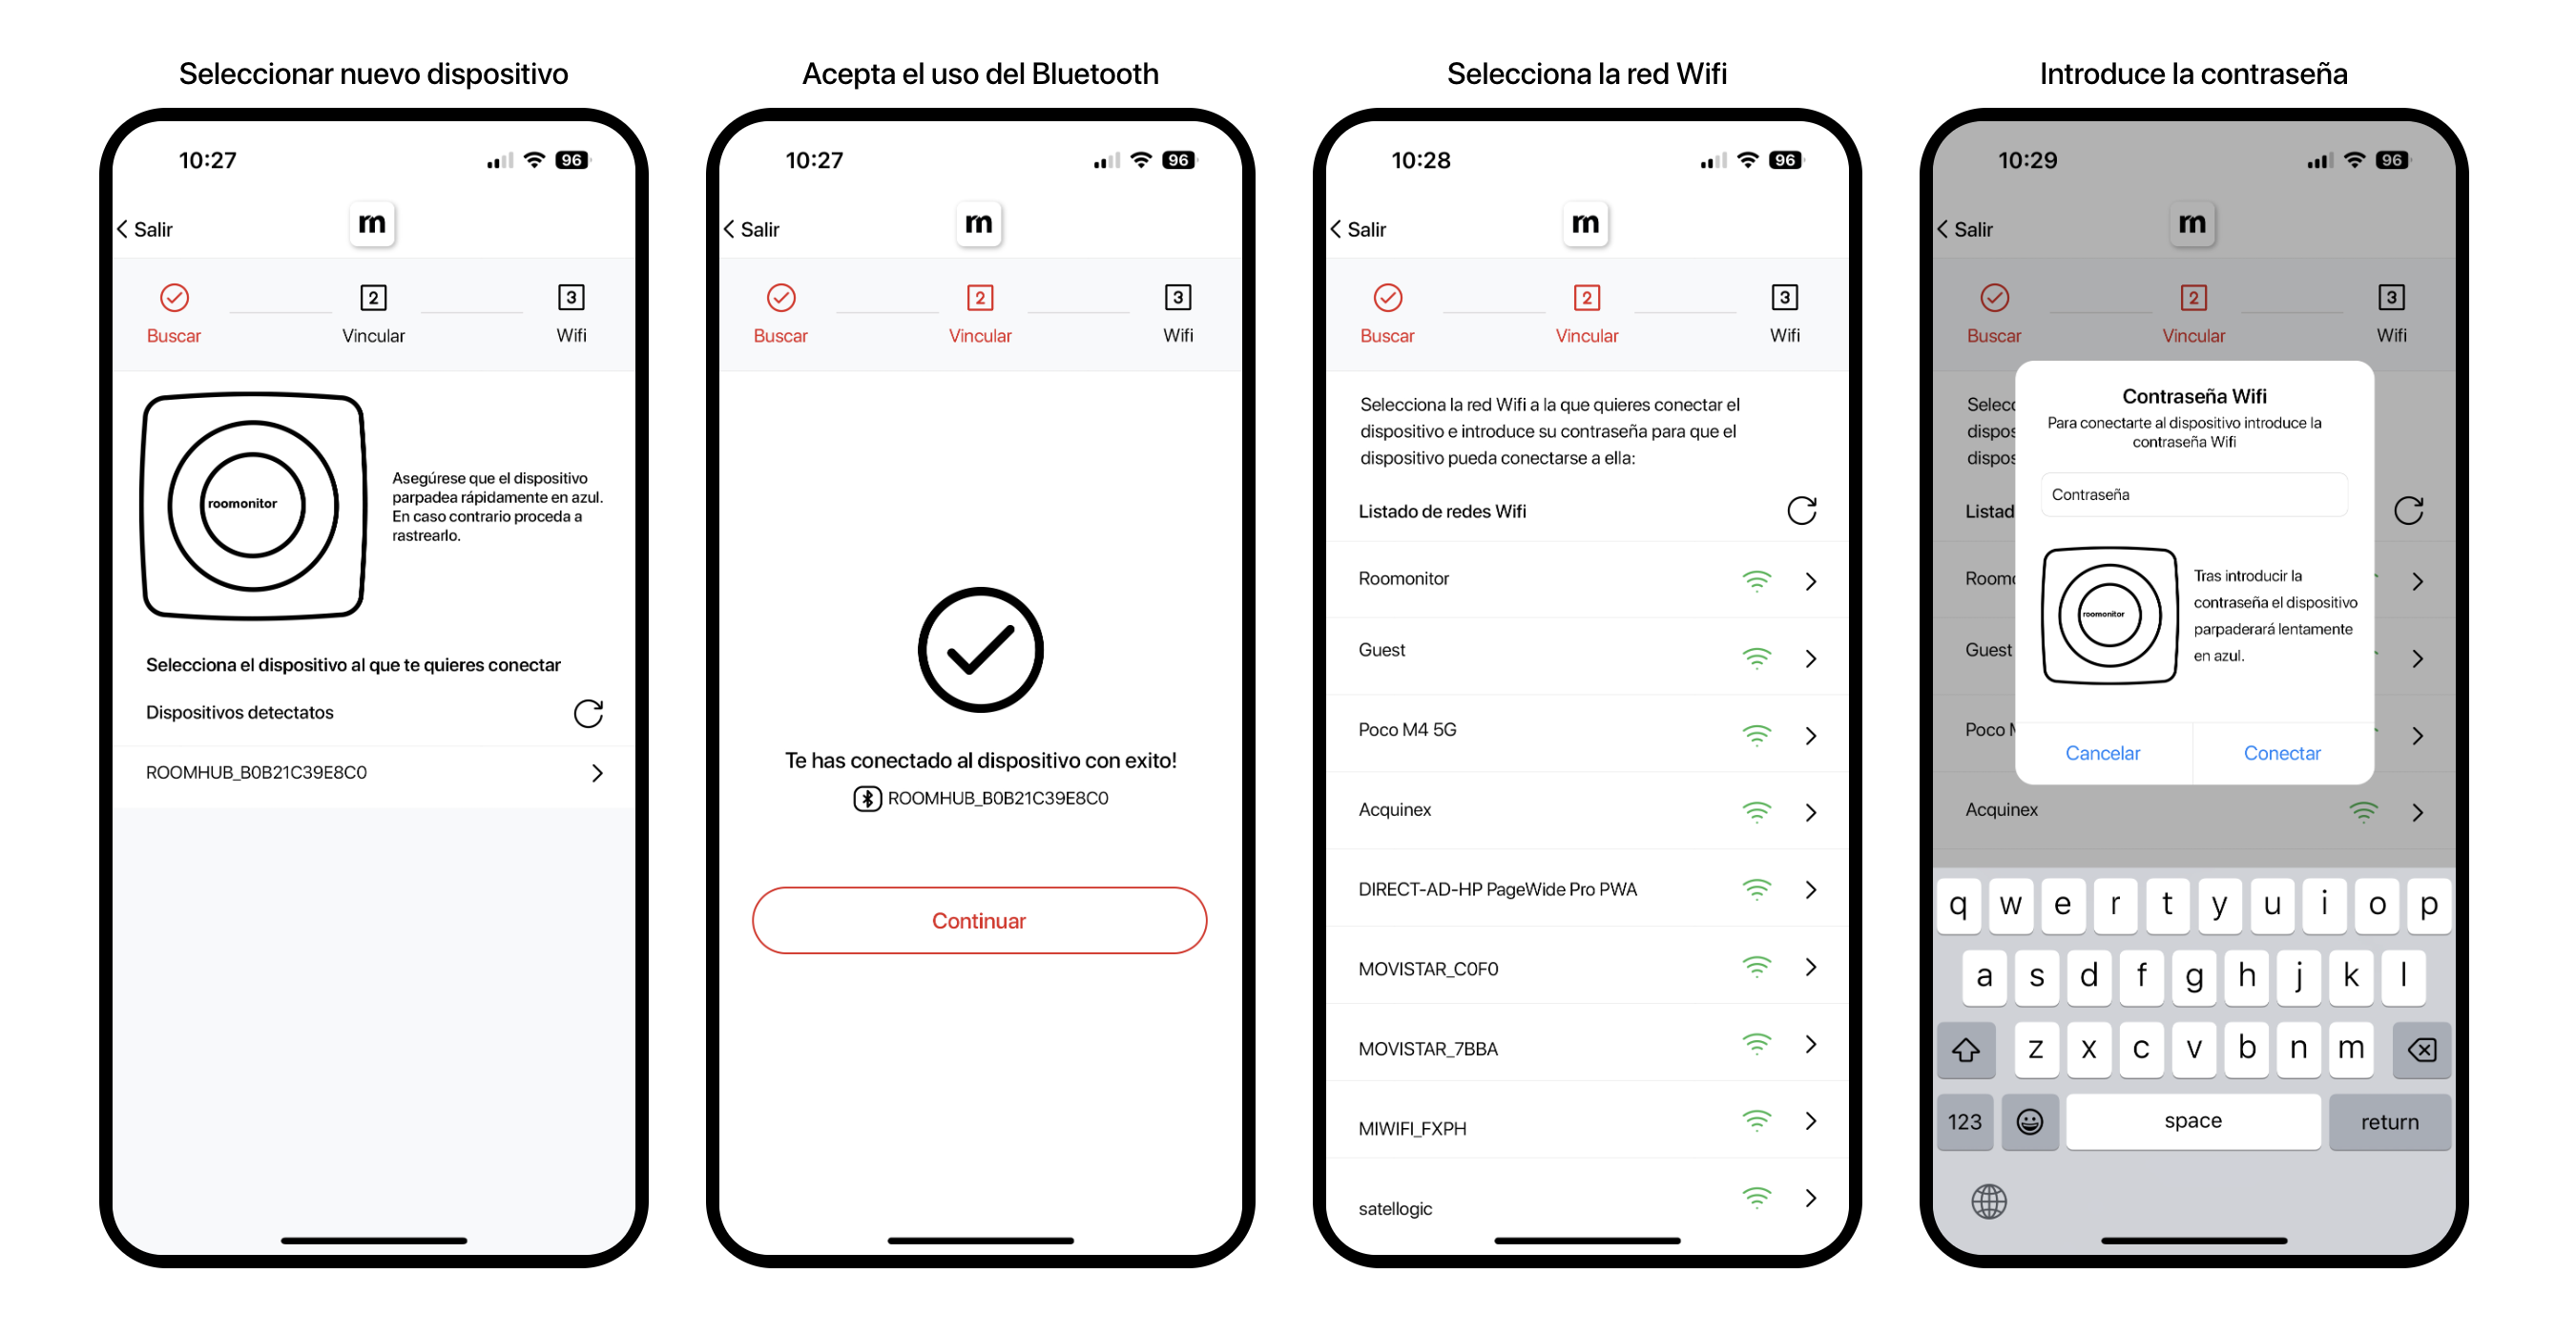
First, you’ll need to add a new device. To do this, select the detected device that appears as connected. Once the pairing is complete, you’ll need to link it to your WiFi network. This step requires you to enter your WiFi password, so make sure you have it ready.

Media immagine

Step 7

Verification and completion

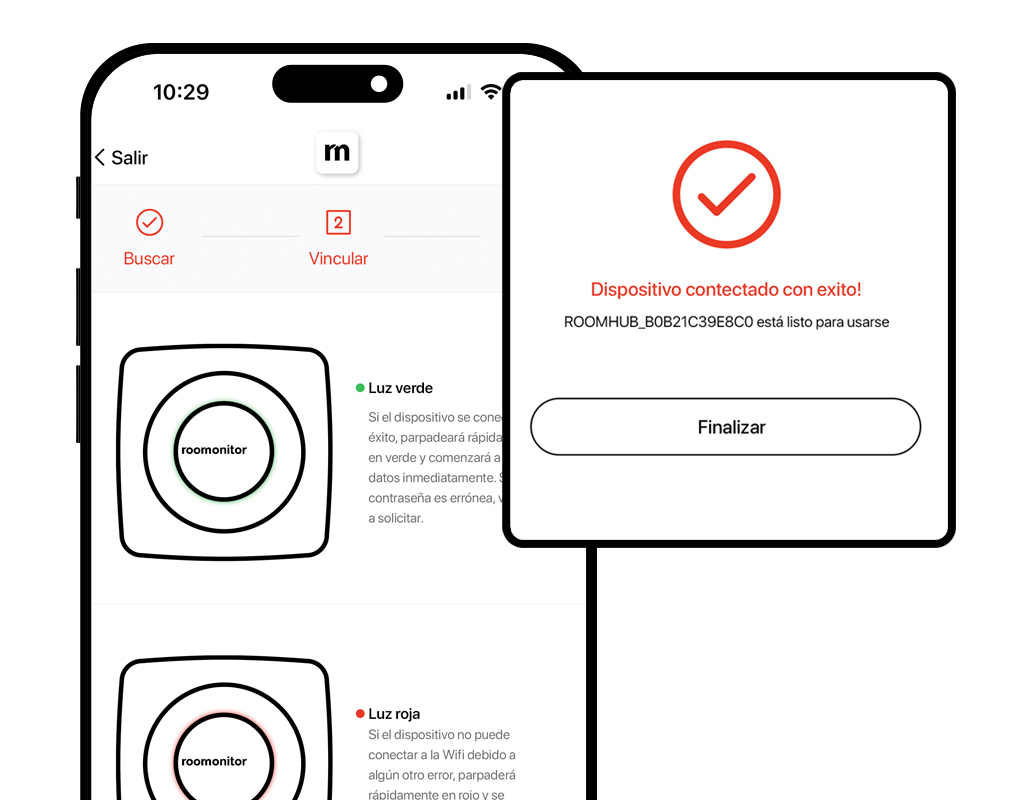
If everything has been correctly configured, the device flashes green. A red flash indicates a problem with the installation and this will require you to repeat the process. The application will give you the option to terminate the process.

Media immagine

Step 8

Data personalisation

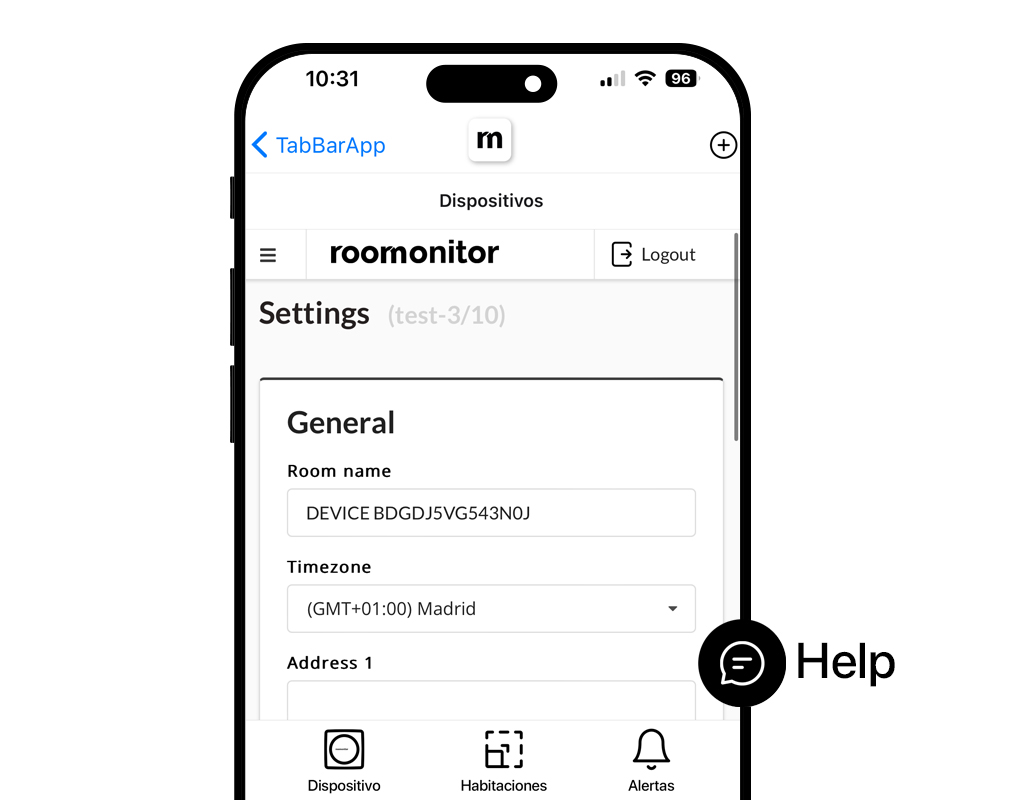
The application will take you to the edit screen where you can modify all the room details such as name, address and phone numbers to receive alerts.

Media immagine

Step 9

Explore your dashboards

Congratulations! You have completed the installation and setup of Roomonitor. We are confident that our device will be of great help to you and your guests.

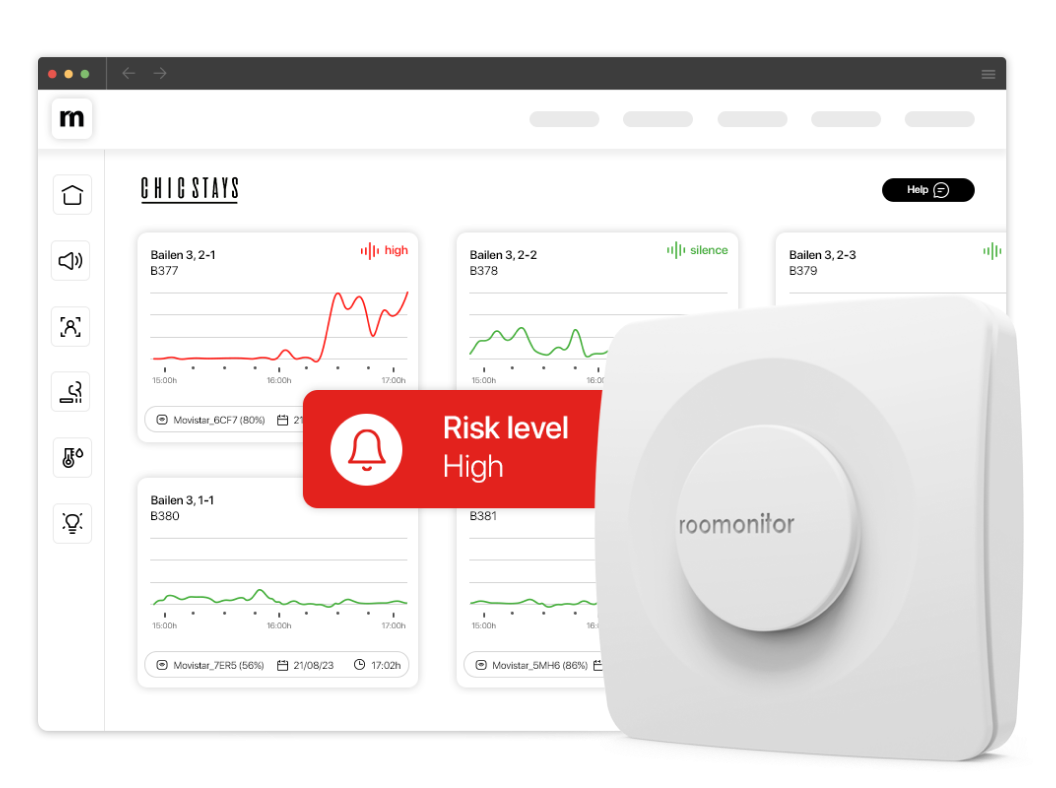
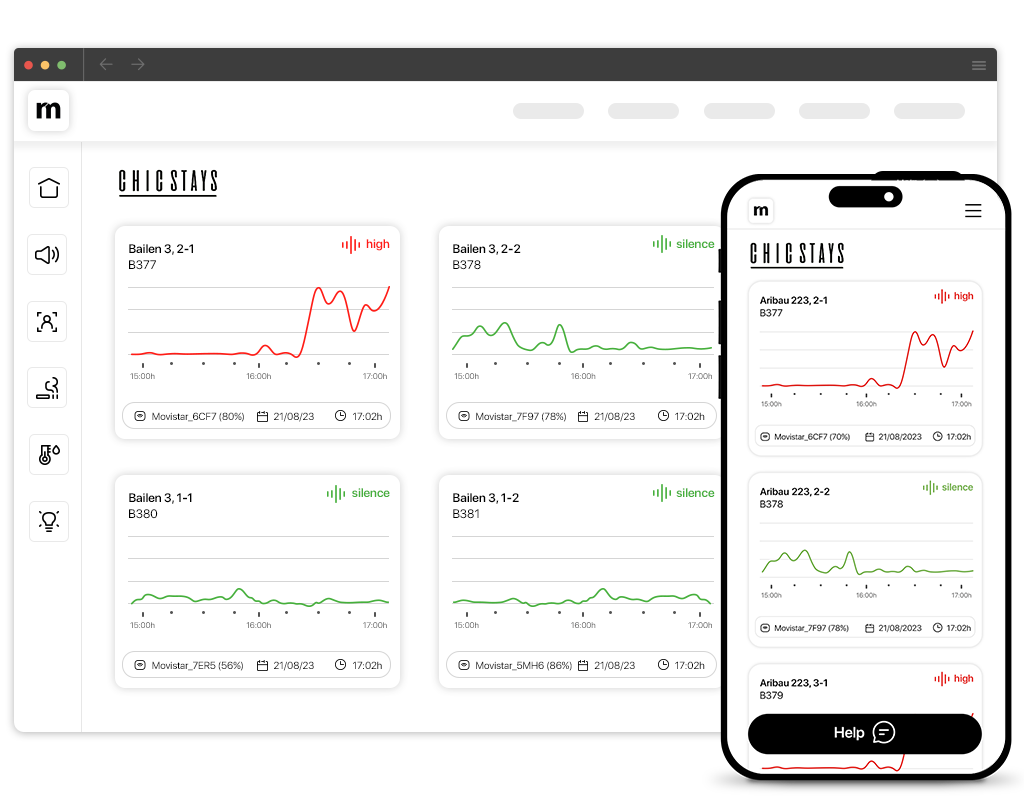
You will be able to review the logs either from the PC application or from any device with your Roomonitor account.

Go to dashboards

 Got questions?

We’ve got answers! Explore our FAQs to find everything you need to know about Roomonitor’s smart solutions, features, and how we can help you enhance your hospitality experience.

Under normal circumstances, your NoiseAlarm device’s sensitivity should be set to Normal or 3, depending on the device model you have. However, there may be situations where adjusting the sensitivity higher or lower is beneficial.

A noise disturbance for neighbors does not always mean extremely loud noise inside the apartment. Some buildings, due to their structure and construction materials, allow even minimal noise to pass through to adjacent apartments, causing discomfort to neighbors. If you receive a complaint from a neighbor but our device did not alert you, do not worry. Increase the sensitivity to Restrictive or 4—this will help detect disturbances much earlier.

On the other hand, if your device is installed in a house where you can be more lenient with noise (e.g., if the neighbors are far away or the walls are thick), you may want to lower the sensitivity to Permissive or 2. This way, the noise alarm will only activate for significantly higher noise levels.

To change the sensitivity of your NoiseAlarm device, log in to www.panel.roomonitor.com with your user credentials. Navigate to “Active Monitors”, select the room where you want to modify the sensitivity, and access “Settings” in the top right corner of the new window.

Under the “Noise” section, you’ll find the “Noise Alert Sensitivity” scale (see image below). The available sensitivity levels are:

Battery saving and outdoor (Designed for outdoor use with constant background noise, the most permissive setting)

Permissive

Normal

Restrictive

Custom

The Roomonitor sensor is designed to preserve tenants’ privacy. It does not have a camera and does not record any sound or listen to what guests say or do. It simply records sound levels (dB) in your home.

We recommend that you inform your guests about Roomonitor. The knowledge of the device’s presence not only passively helps to remind them of coexistence rules but also informs them about the nature and behavior of the device regarding tenant privacy protection.

Additionally, most booking platforms require you to inform guests about surveillance systems in the house. You can inform them in a welcome document; here is an example.

Yes, you will need to connect the device to your Wi-Fi. Roomonitor is compatible with 2.4 GHz Wi-Fi. Read more about Wi-Fi and connectivity.

Roomonitor will notify you if your guests attempt to tamper with the sensor. Read more about tamper detection here.

Yes, you can activate email notifications in your account settings. Read more here.

If you have changed your router, it is very likely that your WiFi network name and password have also changed. Consequently, when you log into the Roomonitor Panel, your NoiseAlarm device will appear as disconnected.

If your NoiseAlarm is visible, you may also notice a constant red blinking light, which indicates that the device is trying to connect to a WiFi network but is unable to find it.

To restore the connection, follow these steps:

Locate the reset button: Once plugged in, find the small hole next to the USB connector.

Press the reset button: Use a small object (e.g., a paperclip) to press the button three times, holding the third press until the lights turn off.

Wait for the blinking blue light: This indicates that the device is now in setup mode.

Reconfigure the device:

Open the Roomonitor app and log in.

Tap the “+” symbol (top right corner).

Select the device again.

Accept Bluetooth permissions.

Select your WiFi network and enter the password.

Once successfully connected, the device will blink green rapidly, and a success message will appear in the app.

After setting up your device, you may want to update your details to ensure you receive notifications correctly when noise levels exceed the set threshold.

To do this, log in to the Roomonitor Panel using your credentials: [Access Roomonitor Panel]

Once inside, go to the “Rooms” section, where you will find a list of all your assigned devices. Each row displays:

Name

Monitor ID

Firmware version

Status

WiFi connection

Edit icon (pencil icon)

Click the pencil icon to open the editing screen, where you can modify the following fields:

Name: The label displayed in the panel; typically, the apartment’s name for easy identification.

Name (voice call): The name you will hear in Roomonitor’s call and SMS alerts. Keep it short and clear.

Phone Owner/Emergency (Call): The phone number for noise alert calls. Ensure the country code (e.g., +34 for Spain) is included.

Phone Owner/Emergency (SMS): The phone number for SMS alerts. Again, include the country code.

Address: The apartment’s address.

Latitude/Longitude: The exact coordinates to correctly place the apartment on the Dashboard map.

Click the orange “Save” button to confirm changes.

Note: Fields marked with * are required. If you have multiple devices, repeat this process for each one.

If your device does not appear in the Roomonitor Panel or has disappeared from the daily report, check the following:

Ensure no changes were made to the apartment’s WiFi network.

Verify that the router is connected and can access the internet.

Check that the NoiseAlarm device is plugged in.

Confirm that the device has not been moved or disconnected by cleaning staff or guests.

If the issue persists, most connection problems can be resolved by restarting the router and the NoiseAlarm device. Simply unplug both from the power source, wait a few seconds, and reconnect them. Within a few minutes, the device should appear in the Roomonitor Panel.

If your device is experiencing connection issues due to a power outage or low battery, you can reset it using the following methods:

Turn off the device: Press the reset button 5 times within 4 seconds.

Restart the device: Press the reset button 3 times within 4 seconds.

Factory reset: Press the reset button 3 times within 4 seconds, holding it on the third press for 5 seconds.

Hard reset: Turn off the device and disconnect the battery.

The device is designed to remain plugged into a power source at all times. It includes a backup battery to prevent data loss in case of power outages, allowing continuous noise monitoring.

If the device remains unplugged for about 20 minutes, you will receive an email notification (if disconnection alerts are enabled). However, once the backup battery is depleted, the device will stop functioning.

Battery lifespan:

With normal usage, the backup battery lasts approximately 2 days.

In low-power mode, it can last up to 2 months, depending on usage and device settings.

The device provides status information through its LED lights. Here’s what each signal means:

🔵 Blinking blue (fast): Device is in setup mode.
🔵 Blinking blue (slow): Attempting to connect to WiFi.
🟢 Blinking green: Successfully connected to WiFi.
🔴 Blinking red: WiFi connection error.
⚪ Blinking white: Factory reset in progress.

If you experience a connection issue, refer to the troubleshooting steps above.

Learn more about our PMS integrations by browsing the articles in the integrations section of our Help Center.

Hey there – Let’s Talk!

Got a question? Need a hand? Or just want to say hi? We’d love to hear from you! Whether you’re looking for smarter hospitality solutions or just curious about what we do, we’re here to help.


    Get the latest updates from us.

    We’ll send you industry news, regular tips on our products and services, and personalized offers tailored to your business needs.

      0
        0
        Your Cart
        Your cart is empty